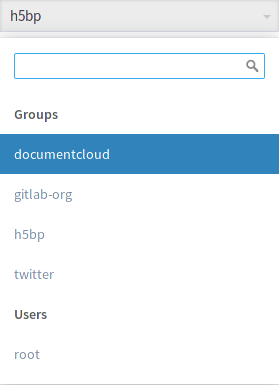
Groups
With GitLab Groups you can assemble related projects together and grant members access to several projects at once.
Groups can also be nested in subgroups.
Find your groups by expanding the left menu and clicking Groups:
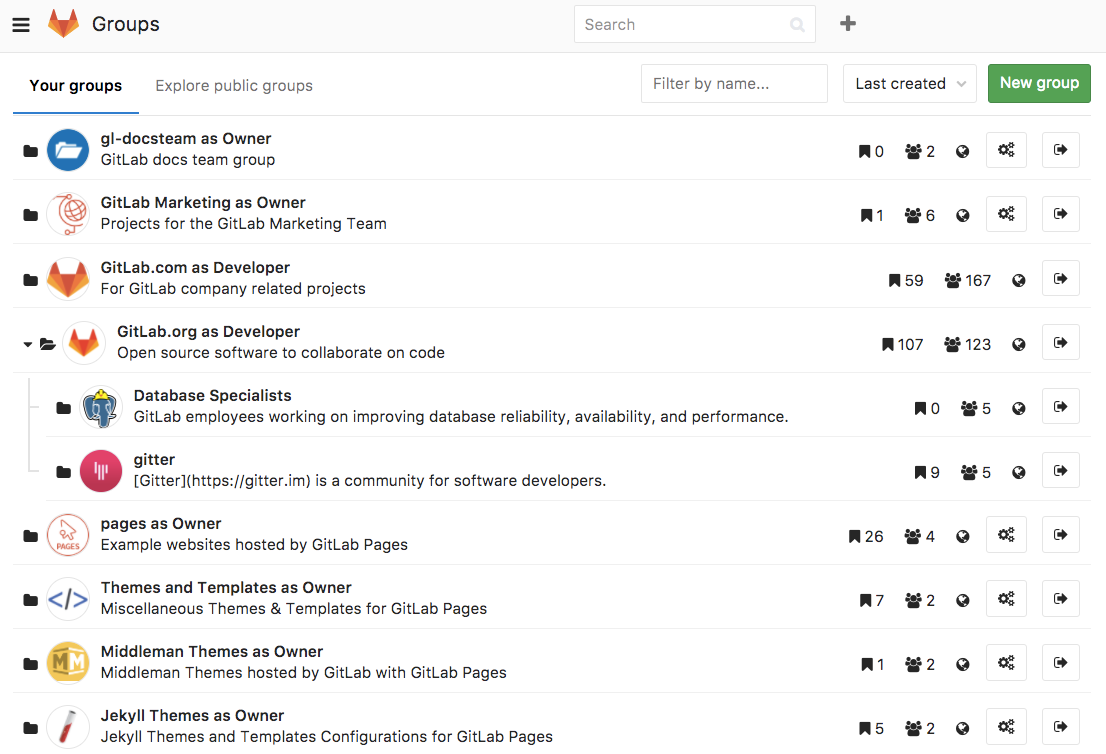
The Groups page displays all groups you are a member of, how many projects it holds, how many members it has, the group visibility, and, if you have enough permissions, a link to the group settings. By clicking the last button you can leave that group.
Use cases
You can create groups for numerous reasons. To name a few:
- Organize related projects under the same namespace, add members to that group and grant access to all their projects at once
- Create a group, include members of your team, and make it easier to
@mentionall the team at once in issues and merge requests- Create a group for your company members, and create subgroups
for each individual team. Let's say you create a group called
company-team, and among others, you created subgroups in this group for each individual teambackend-team,frontend-team, andproduction-team:- When you start a new implementation from an issue, you add a comment:
"
@company-team, let's do it!@company-team/backend-teamyou're good to go!" - When your backend team needs help from frontend, they add a comment:
"
@company-team/frontend-teamcould you help us here please?" - When the frontend team completes their implementation, they comment:
"
@company-team/backend-team, it's done! Let's ship it@company-team/production-team!"
- When you start a new implementation from an issue, you add a comment:
"
- Create a group for your company members, and create subgroups
for each individual team. Let's say you create a group called
Namespaces
In GitLab, a namespace is a unique name to be used as a user name, a group name, or a subgroup name.
http://gitlab.example.com/usernamehttp://gitlab.example.com/groupnamehttp://gitlab.example.com/groupname/subgroup_name
For example, consider a user called John:
- John creates his account on GitLab.com with the username
john; his profile will be accessed underhttps://gitlab.example.com/john - John creates a group for his team with the groupname
john-team; his group and its projects will be accessed underhttps://gitlab.example.com/john-team - John creates a subgroup of
john-teamwith the subgroup namemarketing; his subgroup and its projects will be accessed underhttps://gitlab.example.com/john-team/marketing
By doing so:
- Any team member mentions John with
@john - John mentions everyone from his team with
@john-team - John mentions only his marketing team with
@john-team/marketing
Issues and merge requests within a group
Issues and merge requests are part of projects. For a given group, view all the issues and merge requests across all the projects in that group, together in a single list view.
Create a new group
Notes:
- For a list of words that are not allowed to be used as group names see the reserved names.
You can create a group in GitLab from:
-
The Groups page: expand the left menu, click Groups, and click the green button New group:

-
Elsewhere: expand the
plussign button on the top navbar and choose New group:


Add the following information:
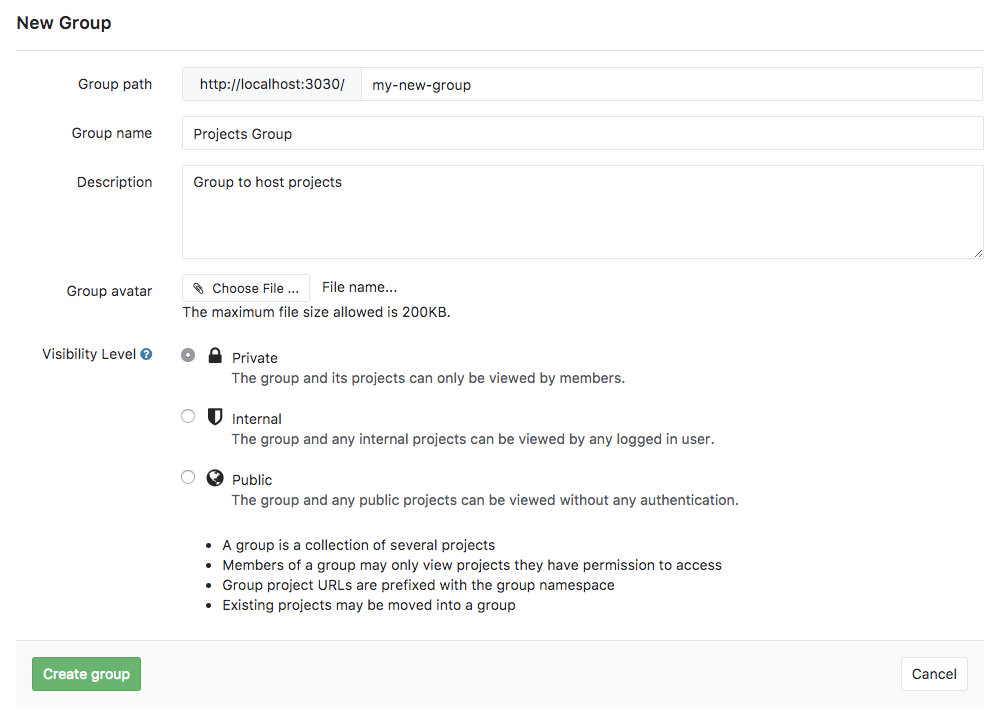
- Set the Group path which will be the namespace under which your projects will be hosted (path can contain only letters, digits, underscores, dashes and dots; it cannot start with dashes or end in dot).
- The Group name will populate with the path. Optionally, you can change it. This is the name that will display in the group views.
- Optionally, you can add a description so that others can briefly understand what this group is about.
- Optionally, choose an avatar for your project.
- Choose the visibility level.
Add users to a group
Add members to a group by navigating to the group's dashboard, and clicking Members:

Select the permission level and add the new member. You can also set the expiring date for that user, from which they will no longer have access to your group.
One of the benefits of putting multiple projects in one group is that you can give a user to access to all projects in the group with one action.
Consider we have a group with two projects:
- On the Group Members page we can now add a new user to the group.
- Now because this user is a Developer member of the group, he automatically gets Developer access to all projects within that group.
If necessary, you can increase the access level of an individual user for a specific project, by adding them again as a new member to the project with the new permission levels.
Request access to a group
As a group owner you can enable or disable non members to request access to your group. Go to the group settings and click on Allow users to request access.
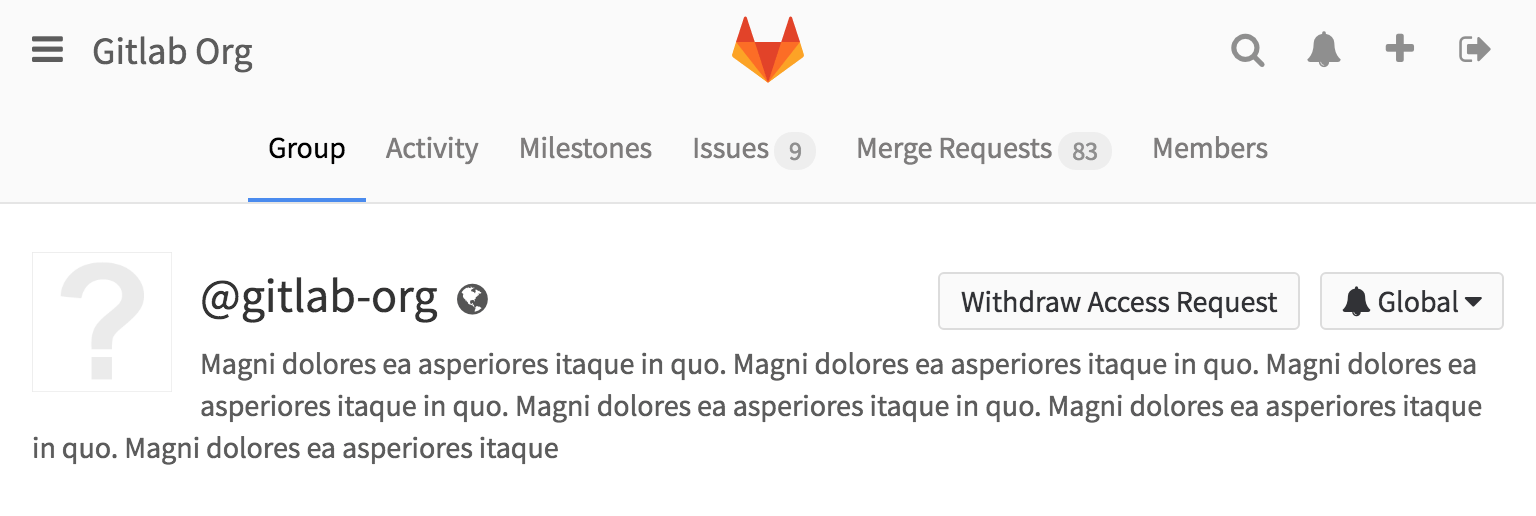
As a user, you can request to be a member of a group. Go to the group you'd like to be a member of, and click the Request Access button on the right side of your screen.
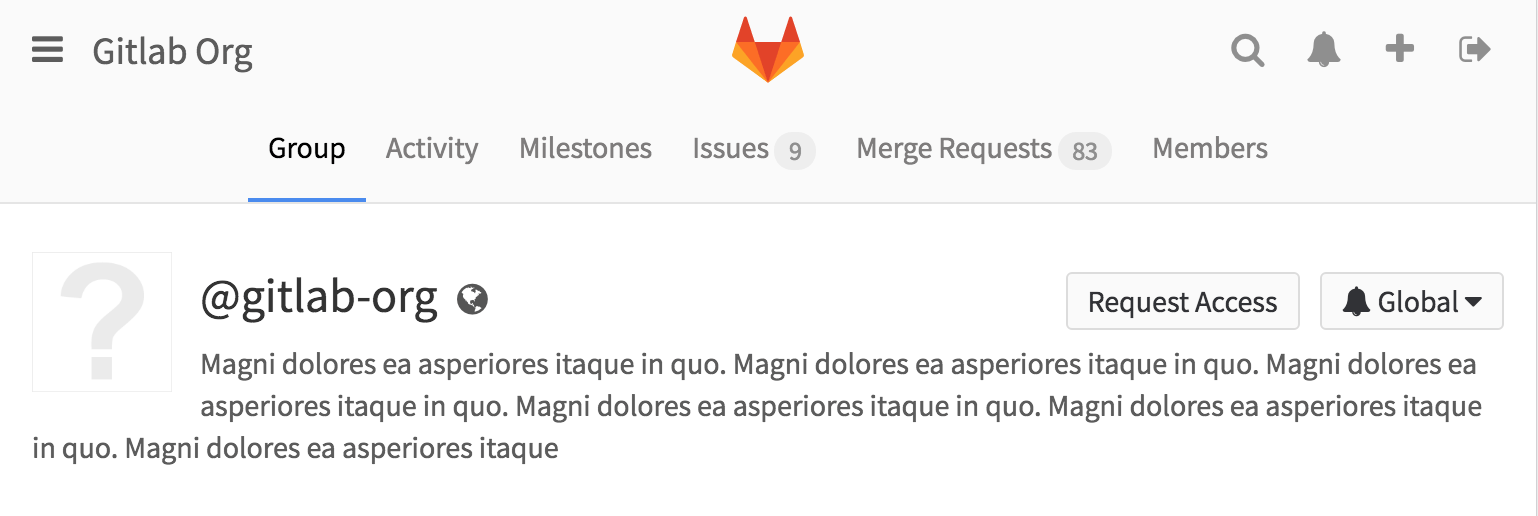
Group owners and masters will be notified of your request and will be able to approve or decline it on the members page.

If you change your mind before your request is approved, just click the Withdraw Access Request button.
Add projects to a group
There are two different ways to add a new project to a group:
-
Select a group and then click on the New project button.
You can then continue on creating a project.
-
While you are creating a project, select a group namespace you've already created from the dropdown menu.
Transfer projects into groups
Learn how to transfer a project into a group.
Sharing a project with a group
You can share your projects with a group and give your group members access to the project all at once.
Alternatively, you can lock the sharing with group feature.
Manage group memberships via LDAP
In GitLab Enterprise Edition it is possible to manage GitLab group memberships using LDAP groups. See the GitLab Enterprise Edition documentation for more information.
Transfer groups to another group
From 10.5 there are two different ways to transfer a group:
- Either by transferring a group into another group (making it a subgroup of that group).
- Or by converting a subgroup into a root group (a group with no parent).
Please make sure to understand that:
- Changing a group's parent can have unintended side effects. See Redirects when changing repository paths
- You can only transfer the group to a group you manage.
- You will need to update your local repositories to point to the new location.
- If the parent group's visibility is lower than the group current visibility, visibility levels for subgroups and projects will be changed to match the new parent group's visibility.
Group settings
Once you have created a group, you can manage its settings by navigating to the group's dashboard, and clicking Settings.

General settings
Besides giving you the option to edit any settings you've previously set when creating the group, you can also access further configurations for your group.
Changing a group's path
Changing a group's path can have unintended side effects. Read how redirects will behave before proceeding.
If you are vacating the path so it can be claimed by another group or user, you may need to rename the group name as well since both names and paths must be unique.
To change your group path:
- Navigate to your group's Settings > General.
- Enter a new name under "Group path".
- Hit Save group.
CAUTION: Caution: It is currently not possible to rename a namespace if it contains a project with Container Registry tags, because the project cannot be moved.
TIP: TIP: If you want to retain ownership over the original namespace and protect the URL redirects, then instead of changing a group's path or renaming a username, you can create a new group and transfer projects to it.
Enforce 2FA to group members
Add a security layer to your group by enforcing two-factor authentication (2FA) to all group members.
Share with group lock
Prevent projects in a group from sharing a project with another group. This allows for tighter control over project access.
For example, consider you have two distinct teams (Group A and Group B) working together in a project. To inherit the group membership, you share the project between the two groups A and B. Share with group lock prevents any project within the group from being shared with another group. By doing so, you guarantee only the right group members have access to that projects.
To enable this feature, navigate to the group settings page. Select Share with group lock and Save the group.

Member Lock
Available in GitLab Starter and GitLab.com Bronze.
With Member Lock it is possible to lock membership in project to the level of members in group.
Learn more about Member Lock.
Advanced settings
- Projects: view all projects within that group, add members to each project, access each project's settings, and remove any project from the same screen.
- Webhooks: configure webhooks and push rules to your group (Push Rules is available in GitLab Starter.)
- Audit Events: view Audit Events for the group (GitLab admins only, available in [GitLab Starter][ee]).
- Pipelines quota: keep track of the pipeline quota for the group